Quick Start Guide
This guide will help you get started with bmquilting.
Data Types and Input Formats
The core algorithms in bmquilting operate on float32 NumPy arrays with values in the range [0.0, 1.0]. This ensures compatibility with both standard images and latents.
Array Shape
All texture arrays must be in HxWxC format (Height × Width × Channels). A shape of (256, 256, 3) is a valid 256×256 RGB image, for example.
Colour images (RGB/BGR):
C = 3Grayscale images: must be expanded to
C = 1— i.e. shape(H, W, 1). A bare 2-D array(H, W)is not accepted; useimg[..., np.newaxis]ornp.expand_dims(img, -1)to add the channel axis before passing to the library.Latents / arbitrary channels: any value of
Cis supported, provided all channels are normalised to[0.0, 1.0].
Mask arrays must be provided in HxW format (Height x Width), using values in the range of [0.0, 1.0].
Automatic uint8 Conversion
For convenience, the library handles standard image formats automatically:
Input: If a
uint8array is provided, it is converted tofloat32and divided by255.0. This is applicable to both textures and masks.Output: If automatic conversion was triggered, the output texture(s) will be converted back to
uint8, multiplied by255.0, and rounded.
Caution
Assumption of Range: The automatic conversion assumes that all channels in a uint8 input are interpreted in the full [0, 255] range.
This is appropriate for RGB/BGR, but may lead to incorrect results for formats with different scales. In such cases, manually convert your data to float32 and normalise it before calling the library functions.
Selecting a Method: Seams vs. Feathering
Choosing between seams and feathering depends on the structure of the source texture.
Structured Textures (Use Seams)
Examples: Tiles, text, brick walls.
These textures have clear geometric shapes. Misaligning a brick by even a few pixels is immediately noticeable. Blurring text in a journal page results in an unnatural appearance.
Seam calculation identifies the path of least resistance through the overlapping area, often following natural lines such as mortar in a brick pattern.
Stochastic Textures (Use Feathering)
Examples: Dirt, grass, granite.
These textures are random or “noisy” at a local level. There is no discernible grid, and the “feel” of the texture is more important than the precise alignment of individual grains.
Feathering — a simple smooth gradient — is significantly faster to compute and effectively blends the two patches without creating visible discontinuities.
1. Square Patching
Square patching is the standard approach where patches are arranged in a regular Cartesian grid.
Basic Generation with Seams
By default, the algorithm uses A* to find optimal seams between patches, minimising visible discontinuities.
import cv2
from bmquilting.square import generate_texture, SquarePatchingConfig

# Load texture
src = cv2.imread("source.png")

# Configure: 50px blocks, 20px overlap, 0.1 tolerance, no seam blending
config = SquarePatchingConfig.with_seams(block_size=50, overlap=20, tolerance=0.1, blend=False)

# Generate a 256x256 texture
out_tex, out_seams = generate_texture(
    src_texs=[src],
    patching_config=config,
    out_h=256, out_w=256, seed=42
)

cv2.imwrite("out_tex.png", out_tex)
cv2.imwrite("out_seams.png", out_seams)
Input |
Output (Texture) |
Output (Seams) |
|---|---|---|
|
|
|
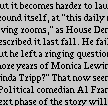
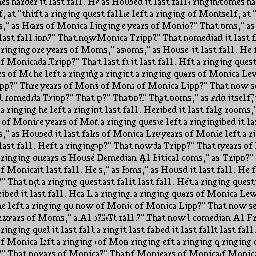
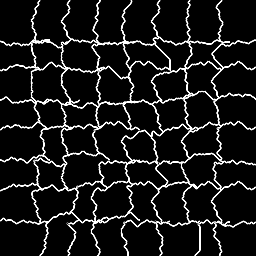
Generation with Feathering
Feathering utilises a smooth gradient blend instead of calculating seams. It is faster and performs well for stochastic textures.
config = SquarePatchingConfig.with_feathering(block_size=50, overlap=20, tolerance=0.1)
Generation with Hybrid (Seams + Feathering)
The with_hybrid option integrates both seams and feathering approaches.
The applied feathering is independant from the computed seam; it’s application is the same as the with_feathering setting, so, depending on the seam shape, it might not yield a seamless transition.
config = SquarePatchingConfig.with_hybrid(block_size=50, overlap=20, tolerance=0.1)
2. Circular Patching
Circular patches are placed on a Hexagonal Lattice.
Basic Generation with Seams
The algorithm uses A* to create seams in a polar unwrapped stripe of the overlapping area; unlike square patching, these seams are not necessarily optimal.
import cv2
from bmquilting.circular import generate_cphl6p, CircularPatchingConfig

src = cv2.imread("source.png")

# Configure: 55px diameter, 50% overlap radius, 0.1 tolerance, and 1.13 spacing factor, with seam blending
config = CircularPatchingConfig.with_seams(diameter=55, overlap_ratio=.5, tolerance=0.1, spacing_factor=1.13, blend=True)

# Generate a 256x256 texture
out_tex, out_seams = generate_cphl6p(
    src_texs=[src],
    patching_config=config,
    out_h=256, out_w=256, seed=0
)

cv2.imwrite("out_circ_tex.png", out_tex)
cv2.imwrite("out_circ_seams.png", out_seams)
Input |
Output (Texture) |
Output (Seams) |
|---|---|---|
|
|
|
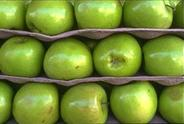
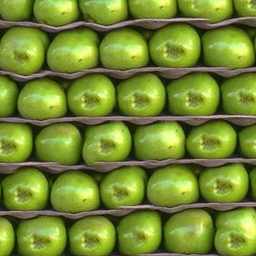
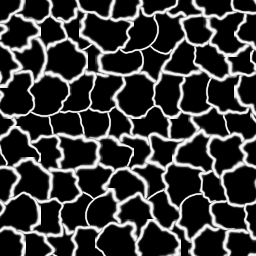
Generation with Feathering
config = CircularPatchingConfig.with_feathering(diameter=55, overlap_ratio=.5, tolerance=0.1, spacing_factor=1.13)
Generation with Hybrid (Seams + Feathering)
config = CircularPatchingConfig.with_hybrid(diameter=55, overlap_ratio=.5, tolerance=0.1, spacing_factor=1.13)
3. Creating Seamless Textures
To make an existing image tileable (seamless), its boundaries can be patched.
Seamless Square
from bmquilting.square import seamless_both_multi

# Makes the 'src' image tileable in both X and Y directions
seamless_img, seams_map = seamless_both_multi(src, config, seed)
Seamless Circular
from bmquilting.circular import seamless_both

# The same applies to circular patching
seamless_img, seams_map = seamless_both(src, config, seed)
Creating Variants
Providing additional texture variations besides the original source may improve the quality of the output.
This can be done by generating a larger texture using the available generation methods, or by using the methods get_texture_variants and get_texture_rotated_variants which can be imported from bmquilting.utils.
Additional textures can be supplied through the optional src_texs argument. When this argument is set, patches are drawn from the textures listed in src_texs instead of from target_tex. If you also want to use target_tex as a source for the patches, include it explicitly in src_texs, as shown in the example below.
    seamless_img, seams_map = seamless_both(
        target_tex=src,
        src_texs=[src, mirrored_src, extended_src],
        patching_config=config,
        seed=0
    )
4. Filling Holes (Inpainting)
The fill functions can be used to reconstruct missing areas (holes) in an image using source textures.
from bmquilting.utils import get_texture_variants, set_invalid_texture_area
from bmquilting.circular import fill_cphl, CircularPatchingConfig
import cv2

import logging
logging.basicConfig(level=logging.INFO)

# Load target (image with holes) and mask (1.0 = keep, 0.0 = fill)
target = cv2.imread("target_with_holes.png")
mask = cv2.imread("holes_mask.png", cv2.IMREAD_GRAYSCALE)

# Repurpose the target texture for use as a source
# by making the hole area invalid
# so that no patches that overlap with it are drawn
src = set_invalid_texture_area(target, mask)

# Create texture variants by rotating and mirroring the provided image
src_textures = get_texture_variants(src)

# Settings for the generation
config = CircularPatchingConfig.with_feathering(diameter=33, overlap_ratio=0.4, tolerance=0.1, spacing_factor=1.0)

# Fill the holes
out_tex, out_seams = fill_cphl(
    target_tex=target,
    mask=mask,
    src_texs=src_textures,
    patching_config=config,
    seed=42
)

cv2.imwrite("filled_tex.png", out_tex)
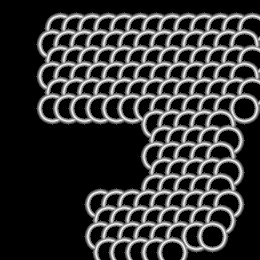
Target (with hole) |
Output (Filled) |
Output (Seams) |
|---|---|---|
|
|
|
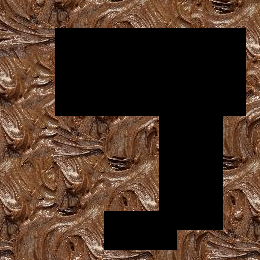
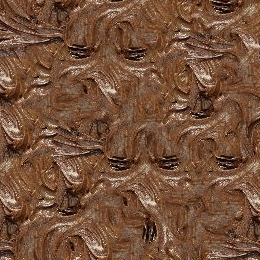
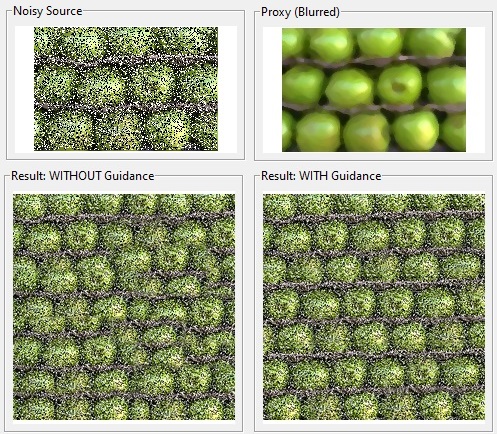
5. Proxy Synthesis (Guided Generation)
Proxy synthesis allows matching patches based on a proxy (e.g. a blurred or downscaled version) while reconstructing the final output with high-resolution source textures.
from bmquilting.circular import generate_cphl6p_guided
import cv2

# Create a blurred proxy to ignore fine noise during matching
proxy = cv2.medianBlur(src, 5)

out_tex, out_seams, out_proxy = generate_cphl6p_guided(
    proxy_texs=[proxy],
    src_texs=[src],
    patching_config=config,
    out_h=512,
    out_w=512,
    seed=seed
)
For more details on scaling and multi-resolution guidance, see the Proxy Synthesis Guide.
The image below was captured from the proxy demo.
6. Texture Transfer (Auto)
Texture transfer allow to transfer a texture to a target image, for example, you can turn a portrait (target) into a stencil made of rice (transfer texture).
from bmquilting.circular import CircularPatchingConfig, texture_transfer
import numpy as np
import cv2

src = cv2.imread("tex2transfer.png")
target = cv2.imread("banana-big.jpg")

# create a mask for the banana
lower_white = np.array([150, 150, 150], dtype=np.uint8)
upper_white = np.array([255, 255, 255], dtype=np.uint8)
mask = 255-cv2.inRange(target, lower_white, upper_white)

cv2.imshow('mask', mask)
cv2.imshow("source", src)

# transfer the texture
tex, seams = texture_transfer(
    src_texs=[src],
    target_img=target,
    patching_config=
        CircularPatchingConfig.with_feathering(
            diameter=61,
            overlap_ratio=.5,
            tolerance=0.0,
            spacing_factor=1.0
        ),
    seed=0,
    # additional optional args
    downscale_factor=2,  # uses a downsized tex2transfer as proxy
    target_roi=mask,  # ignore area outside region of interest
)

cv2.imshow('tex', tex)
cv2.imshow('seams', seams)
cv2.waitKey(0)
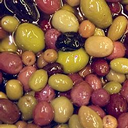
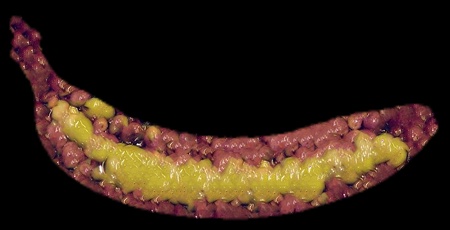
Input Texture |
Input Target |
Output (Texture) |
|---|---|---|
|
|
|

The transfer texture is a wrapper function that calls either texture_transfer_advanced or texture_transfer_guided_advanced depending on whether the downscale_factor optional argument is provided; it also curates the sources and target automatically for you using the utils.curate_for_tex_transfer function.
For more comprehensive documentation on how texture transfer works and how to setup its advanced variants, see Texture Transfer.
7. Progress Tracking and Step Prediction
All generate and circular functions are decorated with a step_predictor, which adds a .predict_steps() method. This is useful for initialising progress bars in UI applications.
from bmquilting.circular import generate_cphl6p, CircularPatchingConfig

# Predict how many patches will be used
total_patches = generate_cphl6p.predict_steps(
    patching_config=
        CircularPatchingConfig.with_seams(
            diameter=65,
            overlap_ratio=0.25,
            tolerance=0.1,
            spacing_factor=1.12
        ),
    out_h=512,
    out_w=512
)

print(f"Expected patches: {total_patches}")
For more details on integrating with a GUI, see the UICD Demo.
Next Steps
Parameter Details: See Arguments Explained.
Advanced Options: See Advanced Configuration.
Examples: Check the
extras/demos/directory to experiment with the methods via a GUI interface.